STEP 2: Contact & Requests
In order to invite your users correctly, please check the following.
An infographic (Dutch only) about access to NEN Connect for administrators and users, can be found here.
Go to "My company > Settings"
Using your company account
In less than 15 minutes you can set up your company account for your colleagues.
STEP 1: Completion of setting up the company account
STEP 2: Contact & Requests
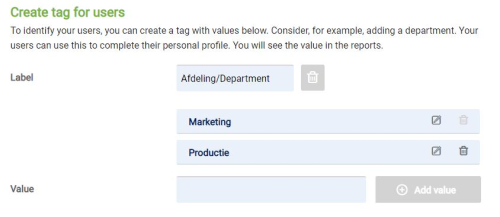
1. Label for users
Company administrators can assign a label with multiple values to their users. Consider, for example, adding a department. Your users can use this to supplement their personal profile. You will see the value in the reports. You can create 1 label with multiple values per company account.
- Enter the name of the label
- Enter the names of the values
- Your users can assign of the values their own user profile: "My profile > My data"
This can be found by clicking on the name of user at the top of NEN Connect.
Note: Both the name of the label and the names of the values apply to both the Dutch and the English user interface.
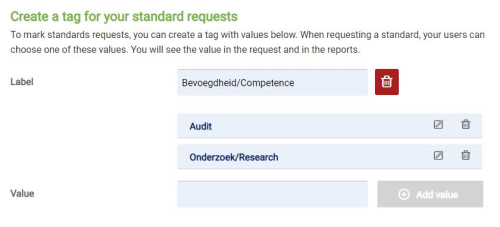
2. Label for standard requests
Company administrators can enrich standard requests with a label with (dropdown) values. Your users can enrich their standard request with values that help you to approve and / or administer them internally more quickly. You will see the value in the requests and in reports. You can create 1 label with multiple values per company account.
- Enter the name of the label
- Enter the names of the values
- Your users can now select one of the values in the standard request
Note: Both the name of the label and the names of the values apply to both the Dutch and the English user interface.
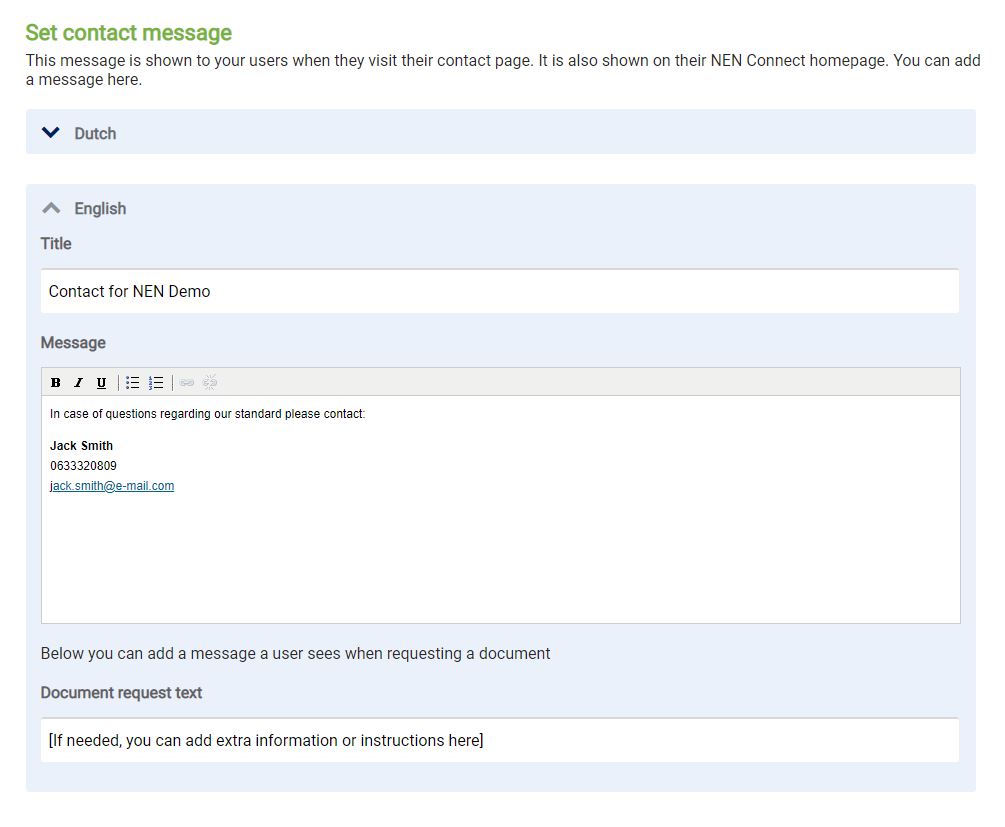
3. Add a contact message
As an administrator of NEN Connect you can enter your contact details here. This is different than for company administrators. Users will see your text when they click on 'Contact' (top right). This information also appears on their NEN Connect homepage. You can fill this in in Dutch and English. Depending on the language choice of your user, one of the two versions is shown.
4. Document request text
At the same time as the contact message, you can optionally add a line of text that will be shown to your users when they request a standard. Here you can, for example, report special instructions or conditions that apply to your business.
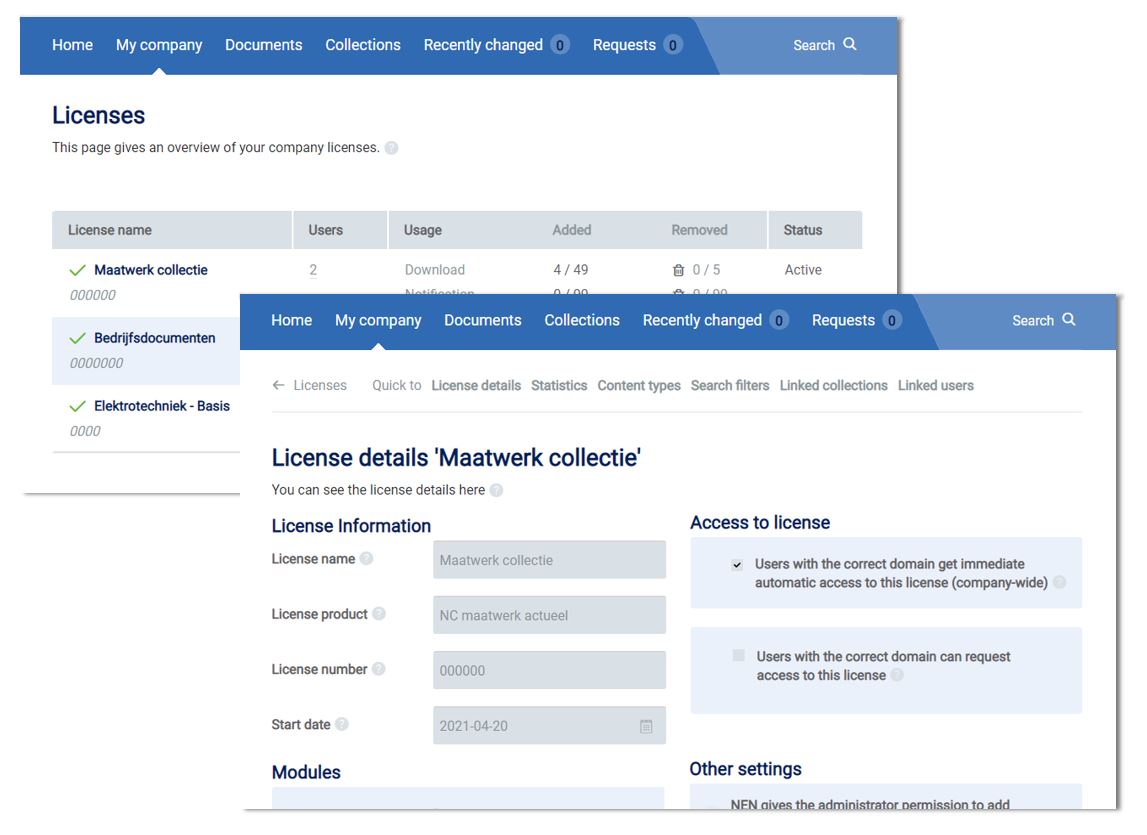
5. Access to company license(s)
Go to “My company > Licenses” and click on the license of your choice. At the top of the license detail page you will find one or two options with access rights for your users.
- “Users with the correct domain get immediate automatic access to this license (company-wide)” – If this is enabled, all users will automatically have access to the license.
- “Users with the correct domain can request access to this license” – If this is enabled, all users must request access. You have to approve or reject each request.
- The license is company-wide if both options are enabled.
- If both options are disabled, the user cannot see the license and will therefore not be able to request access.
At the bottom of the license details page, the administrator can also manually add or remove users' access to a license.